I believe that everyone can learn to sew in free motion

So time to turn your dreams into reality.
Sewing in Free Motion can be used to;
- decorate a quilt
- sew around the edges of applique
- create a picture on fabric.
To start you need to:
- Have the correct set up
- Believe in yourself & take in a few tips
- Dedicate some regular time to practice
Lets talk about the correct set up
1. Lower or cover the feed dogs

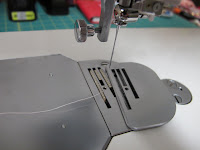
This is a feet dog cover plate being slid into position. It will sit directly over the feed dogs so that they have no influence on fabric movement.
This is a machine with a slide lever that lowers & raises the feed dogs.
Check your machine manual. They can be in different locations at the back and even under the accessory tray of your machine.
2. Fit a free motion presser foot to your machine
(not usually supplied with your machine)
Here is a selection of free motion presser feet
You must use a foot that is designed to fit your machine correctly.
When fitting the foot to your machine ensure that the lever at the top sits above the needle bar.
This will ensure that every time the needle comes up the foot comes up, and every time the needle goes down the foot goes down. Your stitches will be formed correctly and you will be able to move the fabric smoothly.3. Fit a suitable needle in the machine
I prefer to use Schmetz Embroidery needle 90/14 because it is designed to handle thread passing through at high speed without skipping stitches or fraying the thread. Set your machine to needle down if you can.
More information about needle types4. Fit a quilting table attachment to your machine if you have one
Again this is not essential but it sure helps!
The table gives you a large level area on which to work.
They are sold by the folk who sell sewing machines and you need to buy one designed to fit your machine. Lots of people buy these and rarely use them, so ask around, perhaps you can borrow one while you are learning.
4. Find out how to adjust your machine upper thread tension
The tension dial on your machine is designed to increase or decrease the amount of drag on the thread coming off your spool of cotton. A higher number provides more drag and a lower number less drag. Most machines have tension set between 3 - 5 for regular sewing of 2 layers of regular thickness fabric.
Please make a note of what your tension dial is set on before you move it! That way you can return it to where it was after you are finished playing.
This is a picture of a different style of tension dial. It does the same job
I am telling you this because adjusting your tension will help you to achieve a well formed stitch i.e. one that is not looping on the bottom or pulling on the bottom
Also too tight a tension may result in repeated thread breakage especially when working on a single layer of fabric with stabiliser on the back. I use a tension of about 1.0 for this on my machine.
Now that we have covered the set up I will give you time to get organised before my next tutorial.
Part 2 - Believe in yourself - start sewing in free motion
Bye for now....Linda


No comments:
Post a Comment